Cold Solder Joint: Causes, How to Detect It, and How to Prevent It
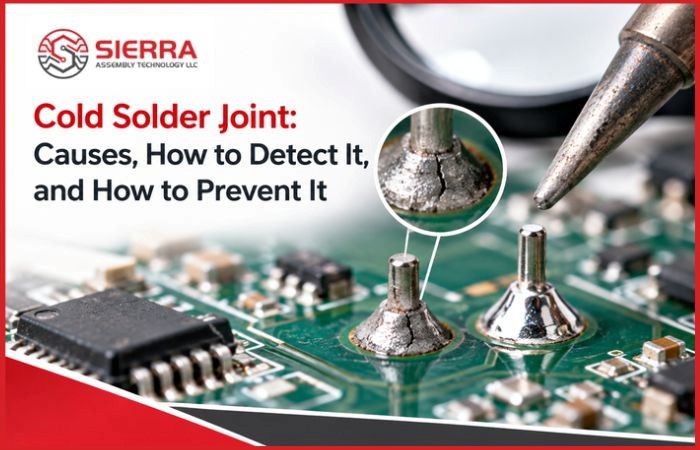
A cold solder joint is a connection where the solder did not fully melt and bond to the pad and component lead. It may look acceptable and even pass a quick continuity check, then fail later under vibration, heat, or time. That is what makes it one of the more expensive PCB soldering defects.
What Is a Cold Solder Joint?
It is a poorly formed solder connection. The solder sits on the surface instead of bonding to it, so the joint has high resistance and little mechanical strength.
You will also see it called a cold solder connection, a bad solder joint, or simply “cold solder.” In day-to-day shop talk, the term often covers any bad solder connection with poor wetting. Strictly speaking, a joint that was disturbed while cooling is a related defect, but the symptoms and the fix are much the same.
What Causes a Cold Solder Joint?
Most causes come down to heat, cleanliness, or movement.
-
Not enough heat: The solder never reaches a proper liquid state, or it does not stay there long enough to wet both surfaces. In reflow, this points to a profile with a low peak temperature or too little time above the solder’s melting point. By hand, it usually means the iron is too cool or the tip was removed too quickly.
-
Heavy thermal mass: Large ground planes, thick copper, and big connectors pull heat away from the joint. A setting that works on a small pad will leave a cold joint on a large one.
-
Oxidized or contaminated surfaces: Oxidation on leads, pads, or old component stock stops solder from bonding. Fingerprints, residue, and moisture cause the same trouble.
-
Weak or wrong flux: Flux removes oxides and helps solder flow. Too little, expired flux, or the wrong type leaves the joint poorly wetted.
-
Movement during cooling: If the component or board shifts before the solder solidifies, the joint cracks internally and looks dull and fractured.
-
Poor iron tip condition: A dirty or worn tip transfers heat badly. Tip temperature on the display means little if the tip is oxidized.
How to Tell a Cold Solder Joint from a Good One
|
Feature
|
Good Joint
|
Cold Solder Joint
|
|
Shape
|
Smooth, concave fillet that blends into the pad and lead
|
Lumpy, rounded, or ball-like
|
|
Wetting
|
Solder spreads evenly across pad and lead
|
Solder beads up or sits on top
|
|
Surface
|
Clean and uniform
|
Grainy, pitted, or cracked
|
|
Strength
|
Firm
|
May shift or rotate under light pressure
|
|
Electrical behavior
|
Stable
|
Intermittent, noisy, or high resistance
|
How to Detect Bad Solder Connections
-
Visual inspection. Magnification catches most hand-soldered and through-hole defects. Look at fillet shape, wetting, cracks, and gaps.
-
Mechanical check. A light probe or gentle tug can reveal a loose joint. Use care so you do not create damage that was not there.
-
Electrical testing. In-circuit testing finds opens and shorts, and functional testing shows how the board behaves under real conditions. Intermittent faults often appear only after heating, cooling, or vibration.
-
X-ray inspection. Joints under BGAs and other bottom-terminated parts cannot be seen from above. X-ray is the practical way to check them.
For production, inspection works best when it is built into the process, not added at the end. Sierra Assembly’s testing and inspection approach combines several of these methods.
How to Repair a Cold Solder Joint
For a through-hole or simple surface-mount joint:
-
Apply fresh flux to the joint.
-
Reheat with a clean, properly tinned tip until the solder flows fully.
-
Add a small amount of new solder if the joint looks starved.
-
Hold the part still until the solder solidifies.
-
Clean off flux residue and inspect again.
If the joint is badly oxidized or contaminated, remove the old solder with wick or a desoldering pump first, then resolder. Reheating a joint without cleaning it often repeats the defect.
Fine-pitch parts and BGAs are different. They need controlled heating and the right equipment, so these repairs belong with a professional PCB assembly rework process.
How to Prevent Cold Solder Joints
In production:
-
Set the reflow profile for the board, not for a generic recipe, and verify it with actual thermal measurements.
-
Store solder paste, components, and boards under controlled conditions to limit oxidation and moisture.
-
Match flux and solder paste to the process and surface finish.
-
Keep the board supported and steady while joints cool.
-
Use the right process for each part. Large through-hole connectors often suit selective soldering better than a standard pass. See mixed technology PCB assembly for how this works on boards with both part types.
In hand soldering:
-
Keep the tip clean and tinned.
-
Heat the pad and lead together, then feed solder to the joint, not to the iron.
-
Use a larger tip or a preheat step for heavy copper areas.
-
Use enough flux and avoid going back over a joint repeatedly.
In design:
-
Add thermal relief on pads tied to large copper areas where appropriate.
-
Follow the component manufacturer’s recommended pad dimensions.
Where Cold Solder Joints Cause the Most Damage
The cost of this defect depends on where the board ends up. A consumer gadget might just need replacing. In other products, an intermittent connection is a serious problem:
-
Medical devices: A signal that drops out unpredictably is a patient-safety issue.
-
Automotive electronics: Vibration and thermal cycling expose weak joints quickly.
-
Aerospace and defense: Field repair is rarely possible, and reliability requirements are strict.
-
Industrial controls: An intermittent fault can be very hard to trace and may halt a line.
This is why lead-free PCB assembly, which needs higher process temperatures, relies on a well-controlled profile.
How Sierra Assembly Helps Prevent Soldering Defects
Sierra Assembly Technology has been building PCB assemblies since 1982 at our facility in Chino, California. We are AS9100 Rev-D and ISO 9001:2015 certified, and our process includes inspection and testing at multiple stages, with X-ray inspection for hidden joints. If a solder joint is a concern on your current design, our team can review your assembly requirements. You can also read about our quality system.
Frequently Asked Questions
1. What does a cold solder joint look like?
Ans: A cold solder joint usually looks dull, grainy, lumpy, or rounded like a ball sitting on the pad. A good joint has a smooth, concave shape that blends into the pad and the lead. Cracks, gaps, or solder that has not spread across the pad are also warning signs.
2. What is the main cause of a cold solder joint?
Ans: Not enough heat is the most common cause. The solder does not stay molten long enough to bond with the pad and component lead. Dirty or oxidized surfaces, weak flux, and movement while the joint cools are the other leading causes.
3. Can you fix a cold solder joint by resoldering it?
Ans: Yes, in most cases. Apply fresh flux, reheat the joint with a clean tip until the solder flows fully, and let it cool without moving the part. If the joint is oxidized or contaminated, remove the old solder first and resolder.
4. How do you test for a cold solder joint?
Ans: Start with a visual check under magnification, then check continuity with a multimeter while the board is powered off. Gently flex the board or press on the component, since a cold joint often changes reading as it moves. For joints under BGAs, X-ray inspection is the reliable method.
5. Can a cold solder joint cause a device to fail only sometimes?
Ans: Yes, intermittent behavior is one of the classic symptoms. The joint may make contact when the board is cool or still, then lose it when the board heats up or vibrates. This is why some devices fail only after running for a while, or when tapped or moved.